Contribute a Sketch
If you’ve tried something with AI in a class or a research project — and you have something honest to say about how it went — this is the right place for it. Rough drafts and partial experiments are welcome. We’re not looking for polished success stories. The most useful sketches are often the ones where something went sideways.
The easy way: just email us
Send a draft to amaranth@unm.edu. A few paragraphs describing what you tried and what happened is enough to start. We’ll help shape it into a sketch and handle all the technical parts.
The hands-on way: submit directly via GitHub
GitHub is a free platform for sharing code and making websites and that’s what the sketchbook runs on. If you want to submit your sketch directly — and see it and shape it as a live webpage before it goes to us — here’s how. Completely optional, but try it!
1. Create a GitHub account
GitHub is the entirely free service that stores the files behind this site. Go to github.com and sign up. Any email works.
2a. Fork the repository
“Forking” means making your own personal copy of the site files — you can edit it freely without touching anything on the live site.
- Go to github.com/amaranth-unm/ai-sketchbook
- Click the Fork button near the top right
- We want the default settings and name, so just click the green
Create forkbutton at the bottom right. - You’ll see the page refresh within 5-10 seconds.
- Notice the URL! It looks like nothing on the page changed, but you are now looking at a repository UNDER YOUR OWN ACCOUNT.
2b. Enable your website
You now have a “local” copy of the repository, which is all files that make the website work. Now, let’s enable your own working copy of the website itself, so you can see how your essay looks as a webpage (instead of just the text file that you’re editing).
- Click the
Settingsnav link near the top of the page - Click the
Pageslink on the left nav - Click the button that says
Noneand change it tomain - Click the
Savebutton - Click the
Codetab to get back to your repository home folder.
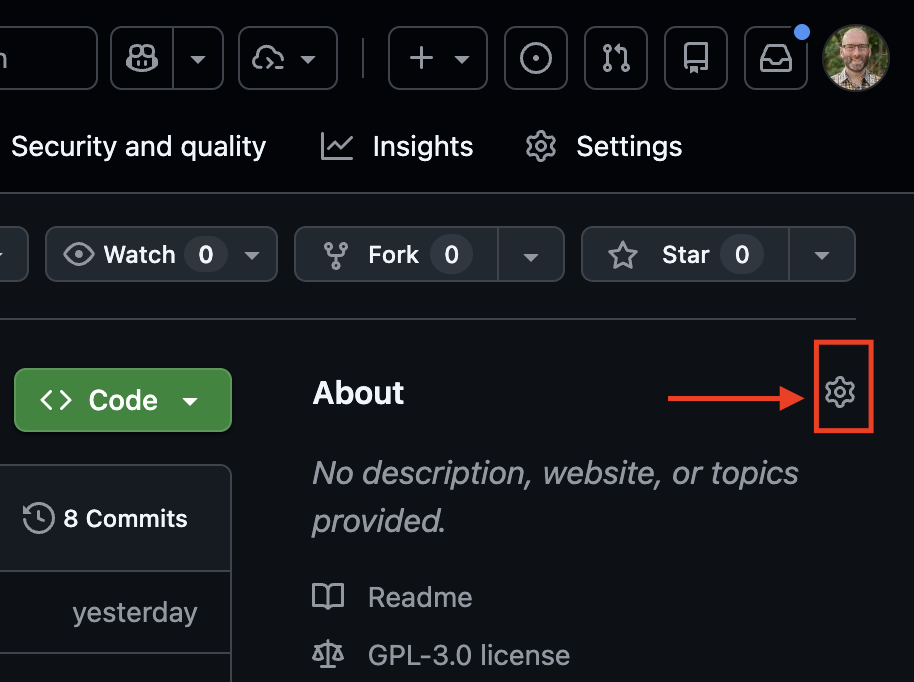
The gear icon next to About sets your website URL.
- Click the gear icon near the upper right
- Check the box for “Use your GitHub Pages website” and click
Save Changes - Now the link that appears next to the gear will take you to your website.
3. Open the editor
From your forked repository Code tab, press the . (period) key on your keyboard. This opens a full text editor in your browser — no software to install.
It looks intimidating because there are a lot of possible features. For this, you only need the list of files on the left and the file editor on the right. The interface is simply a way of viewing and editing text files.
4. Create your sketch file
Each section — teaching, policy, and research — has its own _sketch-template.md file sitting right inside that folder, already filled in with the right metadata fields for that kind of sketch and comments marking what’s required versus optional. Don’t edit it directly; duplicate it.
- In the editor’s left panel, open the
teaching,policy, orresearchfolder, whichever fits your sketch. - Right-click
_sketch-template.mdand select Copy, then right-click the same folder and select Paste. - Rename the copy using all lowercase and dashes, with no leading underscore — like
citation-test.mdormapping-with-ai.md. (A leading underscore tells Jekyll not to publish the file, which is why the template itself never shows up on the live site.) - Open your new file and follow the instructions at the top — fill in the front matter, delete the “before you start” line, and write your sketch.
5. Commit and Rebuild
Your work is basically saved as you work, but you need to tell GitHub to officially move your working files into your repository and rebuild your website.
- Click the branch icon in the left sidebar (it looks like a small network diagram).
- Type a short message describing your change — like “add citation-test sketch” — and click Commit & Push.
6. Check your site
- Go to your repository
Codetab - Click on the URL at the top of the
Aboutpanel on the right - Verify your changes are working
7. Submit your sketch
Go back to your forked repository at github.com/YOUR-USERNAME/ai-sketchbook.
- Click Pull requests near the top
- Click New pull request
- Click Create pull request
- Add a short note and click Create pull request again
That sends your sketch to us for review. We’ll take a look and either merge it into the live site or send you a note with feedback.
Questions?
Reach out at amaranth@unm.edu — we’re happy to help you get unstuck at any step.